My best advice for those looking to create pieces like this is to gather as many references as possible, as this will give you the knowledge and understanding of the pieces in order for you to re-create them. There are never enough references. Also, I believe digital sculpting is very much about trusting the process.
It will take some time until you sort the main shape out and until things start looking the way you want them to, so it is crucial that you keep working on your piece and don’t give up when it is not looking like you first thought it would. With enough refining, you will achieve a good result. Using high-poly sculptures in ZBrush for games requires using and creating a low-poly equivalent of that very same asset.
This is usually achieved by retopologizing each asset manually with a good topology in order to create a solid UV map, which is very time-consuming. Unfortunately, I didn’t have enough time to do so as I had to create a lot of sculpted assets in a short time window, so I had to come up with a solution for that. I used a tool in ZBrush called Decimation Master in order to reduce the polycount without affecting the shape of the asset, while also using DynaMesh to achieve a better topology with quads.
Finally, I separated each part of the prop that I wanted to be a UV island into different poly groups and used the UVing tool of ZBrush to use these same polygroups as UV islands. Although definitely not perfect or optimized, it was a quick fix for a step that would otherwise be very time-consuming. Finally, I hopped into texturing.
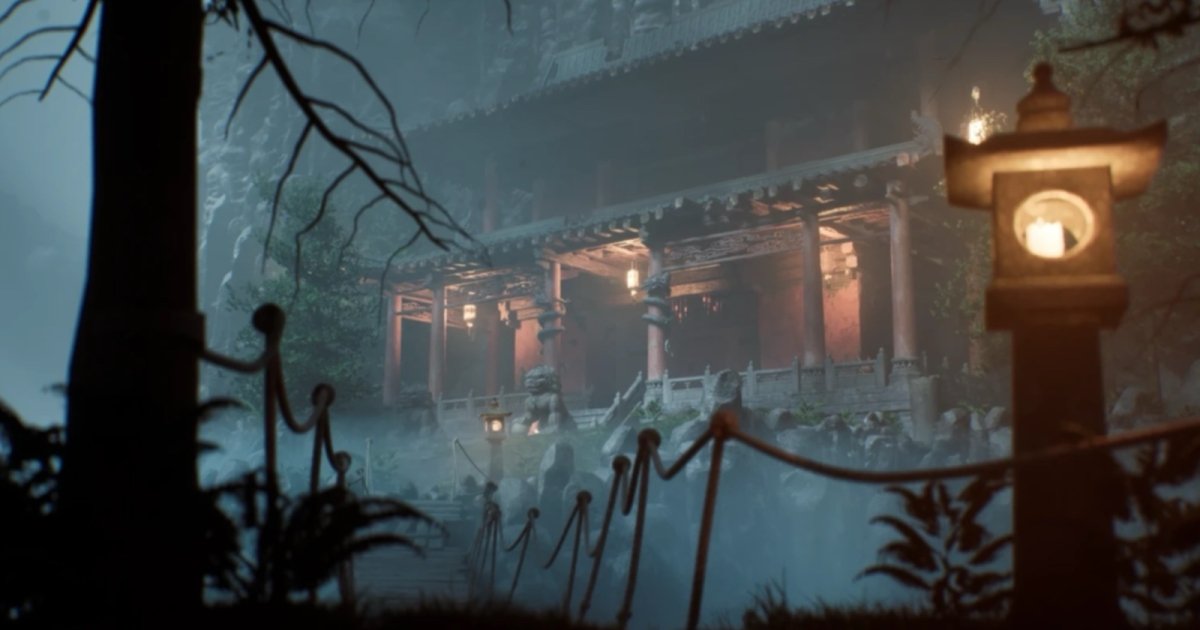
After finishing with these main statue pieces, I worked on the more architectural ones like the rooftop piece, staircase, and many others. The methodology I used for these pieces was essentially the same for all. I started by creating a mid-poly version of these pieces in Maya with UVs, as most of them were used as the actual in-game asset. I would then bring these pieces to ZBrush, where I would weather the sharper edges with the TrimDynamic brush.
On some of these pieces, I also used the Clay Buildup brush to create larger areas of damage, combined with the Dam_Standard brush to create fissures. When it comes to pieces with stone work, carvings, and reliefs, I used images from actual Chinese temples, details, and created alphas in Photoshop by turning them black and white, tweaking the contrast and brightness, and cleaning up some of the noise.
I then applied these to the sculpt with a custom brush and cleaned them up. As a final step, I used the mentioned brush pack I created to add stone, brick, and clay texture for an even more refined high-poly asset. Although I would have liked to manually sculpt all this detailing and carvings by hand, I figured I wouldn’t have time for it, and I concluded that I would rather use this method than have a less detailed surface on the assets.
These sculptures were then all baked into their respective mid/low-poly version in Substance 3D Painter, in order to have the maximum features on their surface with a clean and optimized topology.